Winter is fast approaching, which means it’s crunch time for dressage training. Whether you’re an eventer who’s winding down after a busy season, or a dressage rider who’s preparing to head indoors for the winter season, this is the perfect opportunity to brush up on your skills at home ready to take your next competition by storm.
Basic flat work and obedience is the starting point for a good test, as your horse needs to be able to work well into a contact and respond effectively to your aids. But there are a lot more marks up for grabs that will give you those high scores you’ve been working towards. The scales of training make up the foundation of all ridden work, especially dressage, and marks are awarded not just on the movements but the overall harmony and unity of horse and rider.

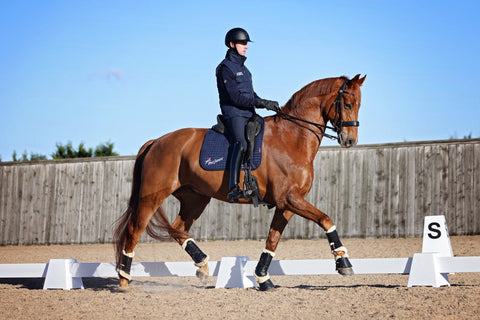
Practicing inside the white boards at home is a great way to put your training to the test and see what areas you need to work on. In a dressage arena, you might find movements come up more quickly and a good contact is necessary to remained balanced through the corners and into each movement.
No matter what discipline, or which level you are competing at, practicing your test riding at home is the best way to get your hands on those last few marks to solidify a high score. Here’s PolyJumps’ helpful guide to know which dressage arena you need and how to get it set up so you can get winter training underway.
Which size arena do I need?
Depending on your discipline, you will either need a 20x40m arena or a 20x60m arena. For those of you who event, all grassroots eventing tests are performed in a 20x40m arena with international events at CCI2* and above held in a 20x60m arena. A 20x40m arena to look at doesn’t seem small, however once you’re inside the boards and riding through your test, you will quickly realise that there isn’t a lot of room and movements can come up fast! This is where your corners become even more important, as you maximise the amount of space you have to get set up for the upcoming movement.
For the dressage riders amongst us, tests are performed in a 20x60m arena from prelim and novice up to international Grand Prix. Whilst the short side (C and A) remains the same, the long sides are 20m longer on each side than a standard small arena. That said, this may seem like a lot more space, but everything can still come up quickly and balance is just as important, particularly for the higher level tests where lateral work is involved!
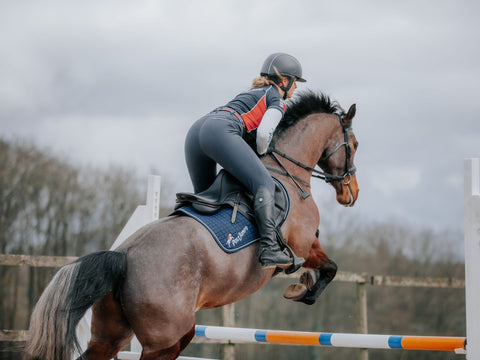
If you feel like you need to work a bit more on the scales of training, we highly recommend pole work to channel your inner dressage diva and get your partnership up to scratch. Check out our blog here to get some pole work inspiration to improve your dressage marks.
Setting up your arena at home
Even if you’re limited on space and don’t have anywhere to fit your 20x60m arena, we still recommend practicing inside a smaller arena to make sure your scales of training and control are where they need to be.
Once you’ve established which size arena you need, setting it up is the next crucial step. Making sure you’ve measured your arena out correctly and got each letter in the right place is vital to a successful test riding experience. If you’re a little bit out or a bit wonky, it can disrupt the whole test and make for an inharmonious test riding experience!
Walking your dressage arena will depend on which type of arena boards you have. If you have continuous boards which connect all the way around, it makes setting up the arena a whole lot easier as each board slots into each other. If you’re using individual boards with spaces in between (which is very common for grassroots eventing tests) then making sure your sides are straight and correctly measured is super important. If you’re setting up on grass, have a quick walk around to make sure the surface is flat and an even footing before you get to work setting out the markers.
Getting the letters right
Now you’ve got your boards in place, the next stage is the letter markers. Letter markers are a super important part of any dressage arena set up as they indicate where each movement should take place and keep you clued up about where you are in the arena at all times. Think of them as map coordinates!

For a 20x40m arena there are 8 letters around the outside of the arena and 3 letters down the centre line, with X marking the centre point. For a 20x60m arena the letters increase to 12 around the outside and 5 down the centre line.
Here’s a helpful guide to getting your letter spacing right:
- The distance between each corner and the first letter on the long side is 6m for both long and short arenas (for example the corner point to letter K is 6m).
- The distance between the first letter and subsequent letters for a SHORT arena is 14m (for example K to E).
- The distance between the first letter and subsequent letters for a LONG arena is 12m (for example K to V).
When choosing where to set your dressage arena up, it’s important to factor in a little bit of extra space to incorporate turning down the centre line to start your test. A straight centre line is the first thing judges see so you want to set off on the right foot! We suggest leaving 3 to 5 metres around the edge, or just at the top end of the arena at A, to ride around and turn down the centre line.
Looking for a dressage arena to get your started? We’ve got exactly what you need to up your training game! Whether it’s a 20x40m or a 20x60m arena you’re after, we’ve got plenty of complete kits, as well as our popular ArenaLite kits, available to choose from. Not sure what you need? Get in touch with us and one of the team will be happy to assist you!

Comments (0)
There are no comments for this article. Be the first one to leave a message!